Dealing with a malfunctioning air conditioner on a scorching day can be frustrating. Before picking up the phone to call a technician, consider trying these do-it-yourself troubleshooting steps. Not only can these simple fixes save you time, but they might also get your AC up and running without professional intervention.
Discovering the root cause of your air conditioner troubles can be the key to a cooler and more comfortable home. Before you schedule a technician, explore these three DIY troubleshooting methods to address common issues.
Read also What to Check First:5 Steps When Your Air Conditioner Is Not Working >>>
1. Check the Thermostat:
The thermostat is the command center of your air conditioning system, dictating when to cool or heat your home. If you’re facing AC issues, the thermostat is a good place to start your troubleshooting journey.
Tips:
- Inspect Settings: Ensure the thermostat is set to the desired temperature and mode (cooling or heating). Sometimes, settings might be accidentally changed, leading to comfort issues.
- Battery Check: Many thermostats operate on batteries. Check and replace them if needed, as dead batteries can cause the thermostat to malfunction.
- Wiring Inspection: Examine the thermostat wiring for any loose connections or damage. Faulty wiring can disrupt communication with the AC system.
Benefits:
- Optimal Performance: Correct thermostat settings ensure your AC operates at its intended capacity, providing efficient cooling or heating as needed.
- Energy Efficiency: Accurate temperature control prevents unnecessary energy consumption, contributing to cost savings on your utility bills.
- Preventive Maintenance: Addressing thermostat issues early can prevent more extensive problems, extending the lifespan of your HVAC system.
By taking a moment to inspect and adjust your thermostat settings, you might find that the solution to your AC woes is simpler than you thought. If issues persist, it’s essential to move on to the next troubleshooting steps.
Extra Description:
The thermostat serves as the brain of your air conditioning system, guiding it to create the perfect indoor climate. When troubleshooting, begin by inspecting the thermostat and ensure it’s operating correctly. Simple adjustments in this area can often resolve issues and restore your AC’s performance.
Start by verifying that the thermostat is set to the desired temperature. It’s not uncommon for settings to be accidentally changed, leading to discomfort. Additionally, if your thermostat operates on batteries, make sure they are functioning correctly. Dead batteries can cause the thermostat to lose communication with the HVAC system.
Take a closer look at the wiring connected to the thermostat. Loose connections or damaged wiring can disrupt the communication between the thermostat and the air conditioner. Addressing these issues promptly is a form of preventive maintenance, as it can prevent more extensive problems down the line.
The benefits of checking the thermostat go beyond immediate problem-solving. When your thermostat operates optimally, it ensures your HVAC system’s efficiency. This, in turn, contributes to energy savings and lower utility bills. Moreover, addressing thermostat issues early on can extend the overall lifespan of your HVAC system, saving you from premature replacements.
In conclusion, the thermostat is a critical component of your air conditioning system, and keeping it in good working condition is key to enjoying consistent comfort. By incorporating thermostat checks into your routine maintenance, you can troubleshoot issues promptly and ensure your air conditioner operates at its best.
2. Inspect the Air Filter:
The air filter is a small yet crucial component of your air conditioning system. Regularly checking and maintaining this filter is essential for optimal performance and indoor air quality.
Tips:
- Regular Inspection: Make it a habit to inspect the air filter at least once a month. A quick check ensures that it’s not clogged with dust or debris.
- Replacement Schedule: Follow the manufacturer’s recommendations for replacing the air filter, typically every 1 to 3 months. This prevents the filter from becoming too dirty and restricting airflow.
- Clean or Replace: If the filter appears dirty or clogged, clean it if reusable, or replace it with a new one. A clean filter allows for unobstructed airflow, enhancing overall efficiency.
Benefits:
- Improved Efficiency: A clean air filter ensures unobstructed airflow, preventing the system from overworking and improving overall efficiency. This directly translates to better cooling performance.
- Enhanced Air Quality: The air filter traps dust, allergens, and pollutants, contributing to better indoor air quality. This is particularly important for individuals with respiratory issues or allergies.
- Extended System Lifespan: Proper air filter care reduces strain on the HVAC system, promoting longevity and minimizing the need for repairs. It’s a simple yet effective form of preventive maintenance.
Regularly inspecting and maintaining your air filter is a simple yet effective practice that can significantly impact your air conditioning system’s performance.
Extra Description:
Moving beyond the thermostat, another crucial element to inspect during your air conditioner troubleshooting is the air filter. Despite its seemingly small size, the air filter plays a pivotal role in maintaining optimal performance and indoor air quality.
Make it a habit to inspect the air filter at least once a month. This quick check ensures that the filter is not clogged with dust or debris, which can hinder airflow and strain the entire system. Additionally, following the manufacturer’s recommendations for replacing the air filter is essential. Typically, this involves replacement every 1 to 3 months, depending on factors like filter type and usage.
If the air filter appears dirty or clogged during your inspection, take the necessary steps to address it. If the filter is reusable, clean it following the manufacturer’s instructions. If it’s not reusable, replace it with a new one. This simple act of maintenance can have a profound impact on your air conditioning system’s efficiency.
The benefits of regular air filter maintenance extend beyond improved system efficiency. A clean air filter contributes to enhanced indoor air quality by trapping dust, allergens, and pollutants. This is particularly crucial for individuals with respiratory conditions or allergies, as a cleaner indoor environment can alleviate symptoms.
Moreover, proper air filter care is a form of preventive maintenance. By reducing strain on the HVAC system, you contribute to the system’s longevity, minimizing the likelihood of breakdowns and the need for costly repairs.
In conclusion, inspecting and maintaining the air filter is a fundamental yet often overlooked aspect of air conditioner care. By incorporating this simple task into your routine, you not only ensure better cooling performance but also promote a healthier and more comfortable indoor environment.
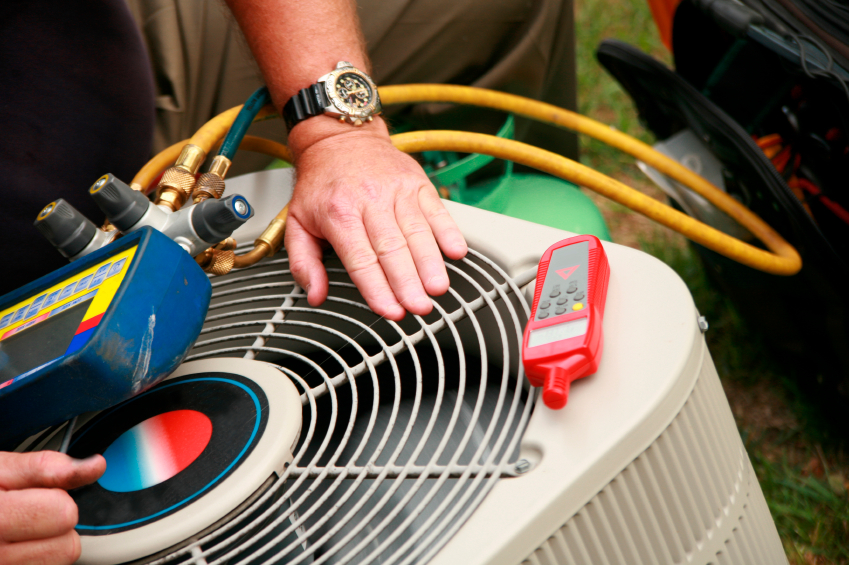
3. Examine the Condenser Unit:
The outdoor condenser unit is a critical component of your air conditioning system, responsible for releasing heat absorbed from your home’s interior. Regular examinations and maintenance of this unit contribute to efficient cooling and prevent potential malfunctions.
Tips:
- Visual Inspection: Periodically check for any visible damage, rust, or signs of wear on the condenser unit. External factors like weather conditions or debris can impact its condition.
- Clear Surroundings: Ensure the area around the condenser is free from debris, leaves, or other obstructions that might hinder proper airflow. Adequate clearance promotes optimal heat exchange.
- Professional Inspection: Consider scheduling a professional inspection annually to assess the internal components. Professionals can identify potential issues that may not be apparent during a visual check.
Benefits:
- Optimal Heat Exchange: A well-maintained condenser unit facilitates proper heat exchange, allowing the system to cool your home efficiently. If the unit is compromised, it can lead to reduced cooling capacity.
- Prevent Overworking: Clearing debris and maintaining an unobstructed area around the condenser prevents the AC from overworking. This, in turn, reduces energy consumption and prevents premature wear and tear.
- Enhanced Lifespan: Proactive inspections and maintenance contribute to the longevity of the condenser unit and the overall lifespan of your HVAC system. Addressing issues early can prevent more extensive damage.
The outdoor condenser unit is exposed to various elements, making it susceptible to wear and tear over time. Regular inspections help identify potential problems before they escalate, ensuring your air conditioner operates at peak performance.
Extra Description:
As you troubleshoot your air conditioning system, don’t forget to direct your attention to the outdoor condenser unit. This component, located outside your home, plays a pivotal role in releasing the heat absorbed from the interior. A well-maintained condenser unit is crucial for efficient cooling and preventing potential malfunctions.
Begin with a visual inspection, checking for any visible damage, rust, or signs of wear on the condenser unit. External factors such as weather conditions or debris can impact its condition. Addressing visible issues promptly can prevent them from worsening and affecting the unit’s performance.
Next, ensure the area around the condenser is clear of debris, leaves, or any obstructions that might hinder proper airflow. Adequate clearance is essential for optimal heat exchange. If the unit is surrounded by clutter, it can overheat and struggle to cool your home effectively.
Consider scheduling a professional inspection annually to assess the internal components of the condenser unit. Professionals have the expertise to identify potential issues that may not be apparent during a visual check. Their thorough inspection can catch problems early on, preventing more extensive damage and costly repairs.
The benefits of examining the condenser unit go beyond immediate problem-solving. A well-maintained unit facilitates optimal heat exchange, allowing your air conditioner to cool your home efficiently. By preventing the unit from overworking through regular inspections, you contribute to energy efficiency and reduce the risk of premature wear and tear.
In conclusion, incorporating regular examinations of the condenser unit into your air conditioner maintenance routine is a proactive measure. This ensures your air conditioner operates at peak performance, providing efficient cooling for a more comfortable indoor environment.
DIY Tips for Coil Cleaning:
Cleaning the coils of your air conditioning system is a DIY task that can significantly impact its efficiency and overall performance. The coils, both evaporator and condenser, are essential for heat exchange, and keeping them clean enhances their functionality.
Tips:
- Turn Off Power: Before starting, turn off the power to your air conditioner to ensure safety during the cleaning process.
- Accessing the Coils: Locate the evaporator coils inside the air handler or furnace unit. The condenser coils are typically found in the outdoor unit. Follow your system’s manual for guidance.
- Gentle Cleaning: Use a soft brush or a vacuum cleaner to gently clean the coils. Avoid using sharp objects that may damage the fins or coil surfaces.
Benefits:
- Efficient Heat Exchange: Clean coils facilitate efficient heat exchange, allowing the system to cool your home effectively.
- Enhanced Cooling Performance: Removal of dust and debris ensures unrestricted airflow, contributing to enhanced cooling performance.
- Preventive Maintenance: Regular coil cleaning prevents issues such as reduced efficiency and potential coil damage, extending the lifespan of your HVAC system.
Incorporating coil cleaning into your DIY maintenance routine is a simple yet effective way to ensure your air conditioner operates at its best. It promotes energy efficiency, prevents potential problems, and contributes to a more comfortable indoor environment.
Understanding Warning Signs:
Being attentive to warning signs is crucial for maintaining a well-functioning air conditioning system. Recognizing and addressing these indicators promptly can prevent more extensive damage and ensure continuous comfort in your home.
Tips:
- Unusual Noises: Strange sounds, such as squealing, banging, or hissing, may indicate mechanical problems. Prompt investigation and professional assessment are essential.
- Inadequate Cooling: If your AC consistently fails to cool your space adequately, despite regular maintenance, it’s time to consult a professional. This may signal deeper issues with the compressor or refrigerant levels.
- Frequent Cycling On and Off: Rapid and frequent cycling on and off, known as short cycling, can strain the system. A professional can determine the root cause, such as thermostat issues or a malfunctioning component.
Benefits:
- Timely Repairs: Understanding warning signs allows for timely repairs, preventing issues from escalating and ensuring continuous comfort.
- Extended System Lifespan: Prompt professional intervention and addressing warning signs contribute to the longevity of your air conditioning system, reducing the need for premature replacements.
- Preventive Maintenance: Recognizing potential problems before they worsen enables preventive measures, minimizing the risk of breakdowns and costly repairs.
By staying vigilant and recognizing warning signs, you play a proactive role in the maintenance of your air conditioning system. Addressing issues promptly not only ensures a more reliable cooling system but also saves you from potential discomfort and expenses down the road.
FAQ:
Q1: Why is my thermostat not responding?
- A: Check for issues such as dead batteries, loose wiring, or a faulty thermostat. Adjusting settings and addressing these issues can often resolve the problem.
Q2: How often should I replace my air filter?
- A: The frequency depends on factors like filter type and usage. Generally, check the filter monthly and replace it every 1 to 3 months.
Q3: Can debris around the condenser unit affect my AC’s performance?
- A: Yes, debris can hinder proper heat exchange. Regularly clearing the area around the condenser unit ensures optimal performance.
Q4: What are the benefits of cleaning evaporator and condenser coils?
- A: Cleaning coils enhances heat exchange efficiency, leading to better cooling performance and increased energy efficiency.
Q5: When should I call a technician after troubleshooting?
- A: If troubleshooting doesn’t resolve the issue or if you notice signs of more significant problems, it’s advisable to call a technician for professional diagnosis and repair.